1 / 2 · Installing the center fin

2 / 2 · Adjusting fin position

Took the board out of the bag and found a small screw and metal plate left over? They may be the parts that secure the center fin. Let's look at the shape of the fin box first, then go through installing the fin and adjusting its position in order.
01. Check your board's fin box first
This picture shows the type secured with a screw and plate. The plate is a small metal screw plate that goes into the slot of the fin box. It pairs with the screw to hold the fin in place.
Some boards use a different locking system or a dedicated fin. If yours looks different, don't force it in; check your product's fitting steps. It helps to keep small parts together somewhere easy to see rather than setting them down on the sand.
02. Put in the plate and secure the fin
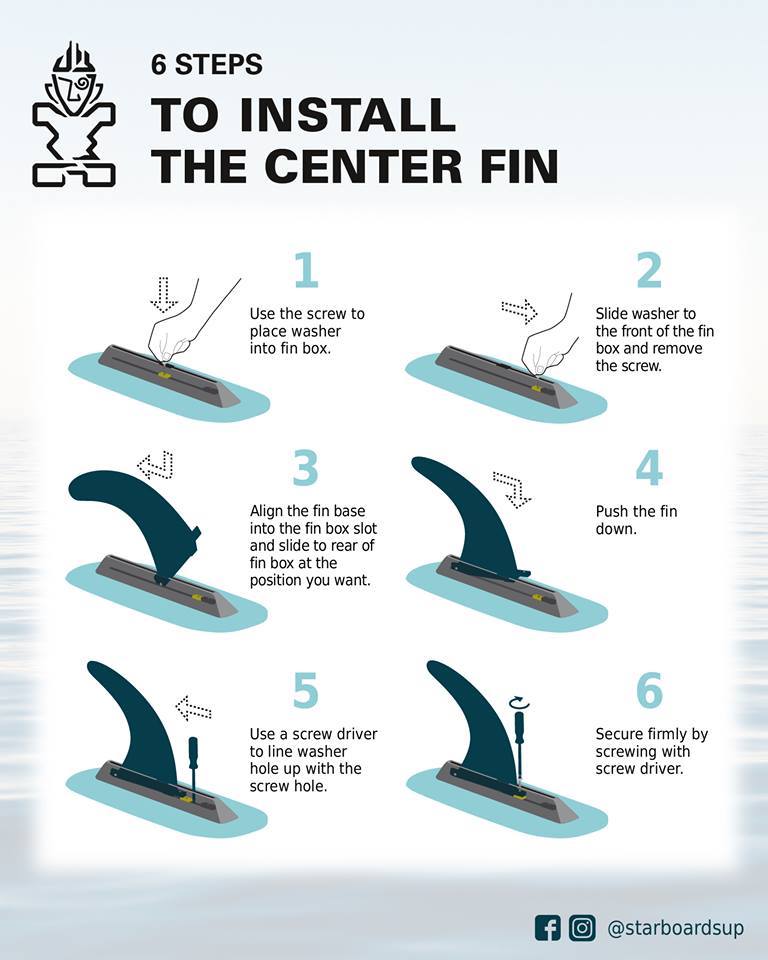
If you lightly attach the screw to the plate, you can use it like a handle when putting the plate into the narrow slot. Slide the plate forward in the slot, remove the screw, then install the fin.
Finally, line up the screw holes of the fin and the plate, then tighten. If they don't line up, don't force the screw; check the position again.
- Use the screw to put the plate into the slot and slide it forward
- Remove the screw, insert the pin on the fin base into the slot, then slide it toward the back of the fin box to the position you want
- Press the fin base down to seat it and line up the two screw holes
- Tighten the screw and check that the fin doesn't wobble
03. Move the fin a little, and the feel changes
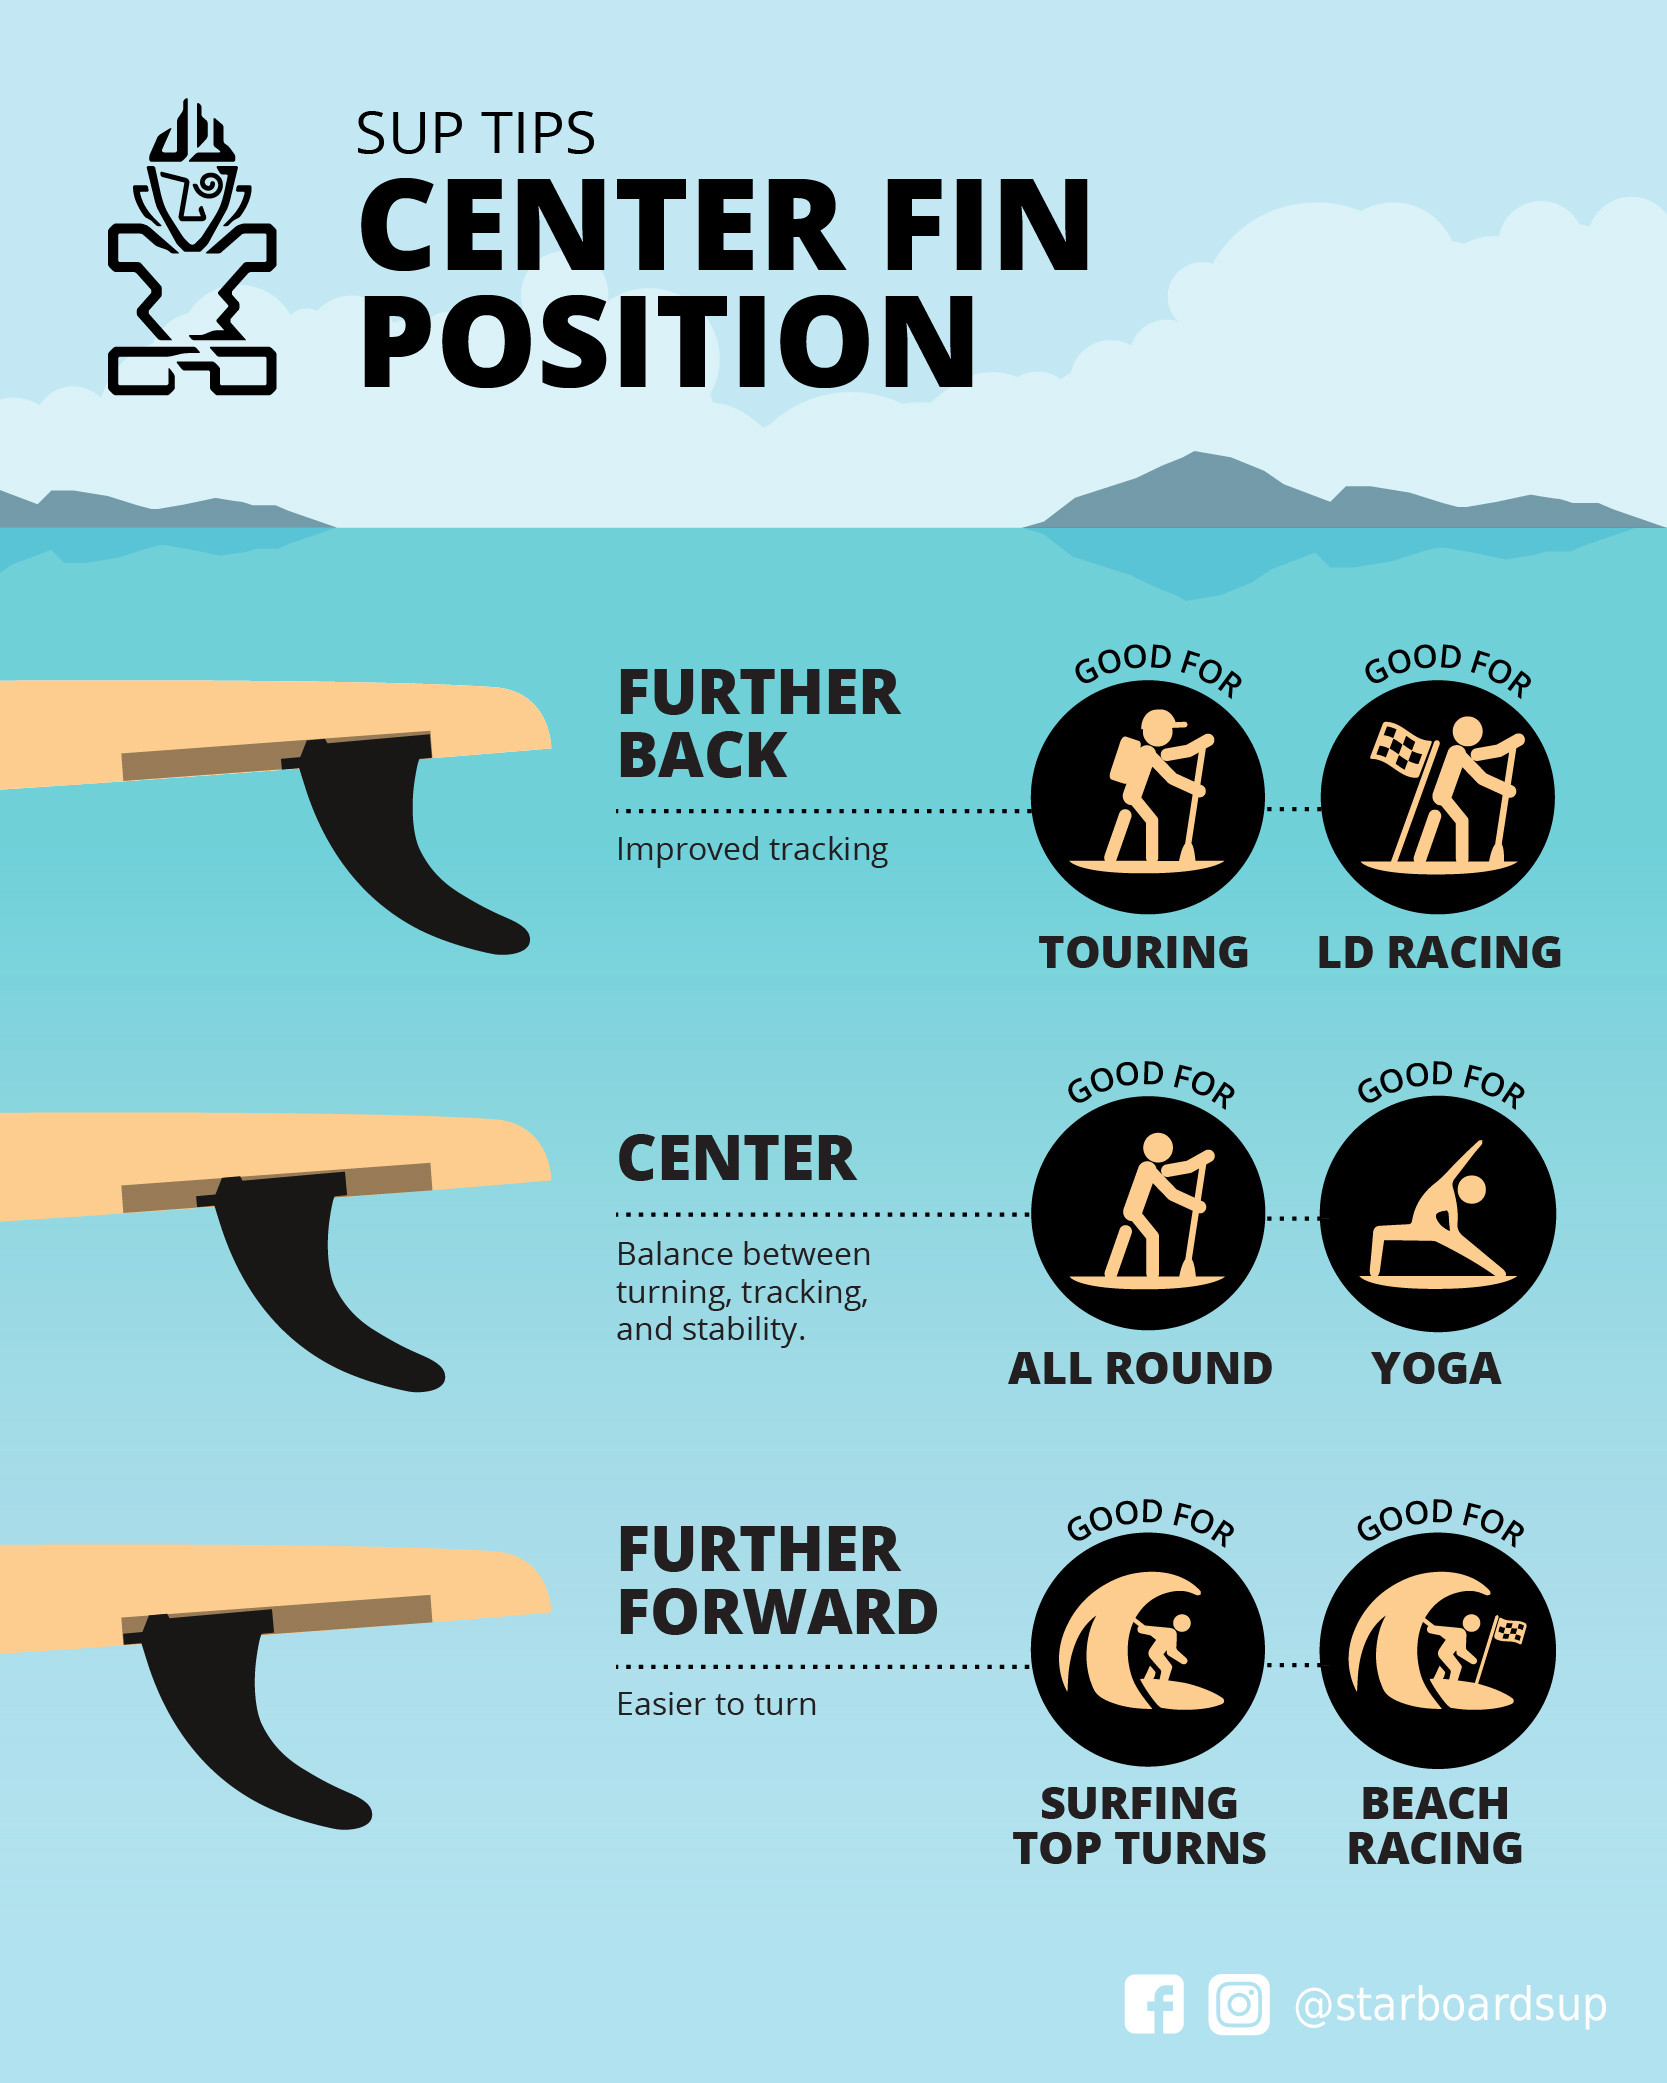
Moving the fin toward the tail helps it hold a straight line; moving it toward the nose helps it turn. The middle is where you can feel out the balance between the two.
At first, try the middle to get a feel. Changing only the position, with the same board and the same fin, makes the difference easy to compare. This only applies to setups that let you slide the fin forward and back in the slot.
| Fin position | What to expect |
|---|---|
| Toward the tail | Helps hold a straight line |
| Middle | Balance of tracking and turning |
| Toward the nose | Tends to turn more easily |
04. Moved the fin? Check it's secure again
Even once you've found the position you want, you're not ready if the screw is loose. After moving the fin, check again that it's secure, and when you go in, make sure the water is deep enough that the fin won't touch the bottom or rocks.
Sources and scope
The illustrations are Starboard's two original infographics on installing and positioning a center fin; the explanation is Starboard Korea's commentary. The installation picture applies only to fin boxes where the fin is secured with a screw and plate, and the position comparison describes general tendencies for fin boxes that let you move the fin. In the commentary, the part the diagram calls a washer is described as a plate (a small metal screw plate), matching its role in the diagram. Each model's own mounting method and tightening instructions come first.
The illustration is Starboard's original artwork; the explanation is Starboard Korea's editorial guide, translated into English here. Sources checked: 2026-09-08.